Monday, June 18, 2012

Chinese Beef & Broccoli

Chinese food is one of those things that I think everyone loves, and I don't know anyone who doesn't! However, it is terrrriibbblllleeee for you. Beef & Broccoli is one of my favorites, as well as crab rangoons, egg drop soup, orange chicken, mmmmmm! But, I'll save those for another day. This Beef with Broccoli recipe is only around 330 calories too.

Ingredients
~3/4 lb round steak, cut into 1/4 in strips (sometimes I'll use sirloin if it's on sale..it's more tender)
~1 lb broccoli, cut up into florets
~1/3 cup oyster sauce
~2 tsp sesame oil
~1/3 cup white wine
~2 tsp soy sauce
~1 tsp sugar
~1 tsp cornstarch
~About 3 Tbsp vegetable oil
~1 slice ginger root
~1 clove of garlic peeled and smashed

1. Stir together the oyster sauce, sesame oil, white wine, soy sauce, sugar, and cornstarch. Add beef strips to the marinade/sauce and let marinate in the fridge for about an hour.


2. Heat the vegetable oil in a wok or large skillet over medium-high heat, and stir/toss around the garlic and ginger for about 2 minutes to flavor the oil. Then, pull out the ginger and garlic clove and throw it in your compost pile :)

3. Stir the broccoli around in the oil, and toss & stir it until it's nice and green to your desired doneness (I like mine still crunchy but where the heads are JUST starting to get soft) right around 5-7 minutes. Remove the broccoli and set aside.


4. Add a little more oil to the wok if needed. Stir and toss the beef WITH the marinade in the wok until the beef is cooked and the sauce turns into more of a glaze (about 5 minutes).


5. Return the broccoli to the wok and toss with the beef for about 3 minutes to heat through and thoroughly coat. Makes 4 servings. Serve over rice if desired!


Let me know what you think! 

Monday, June 11, 2012

Five Ingredient Soup

I LOVE LOVE LOVE LOVE LOVE soup!!! I LOVE LOVE LOVE LOVE LOVE Mexican food too!!! Tortilla soup, Enchilada soup, Taco soup.....mmmmm!!! I'm such a sucker for them!! Well, I have a five ingredient soup that is not only DELICIOUS, it's HEALTHY!!! and cheap!!


Ingredients
-1 can corn
-1 can fat free chicken broth
-1 can No Fat Rosarita Green Chile & Lime Refried Beans
-1 can Peeled & Diced "Chili Ready" Tomatoes
-1 can Black Beans "Seasoned"

1. Mix all together in a pot, and stir until refried beans have "melted" and blended thoroughly. Usually by the time it's boiling its ready.


Here's the finished product! Yum!! It's 143 calories per 1 cup of soup. My bowl holds 2 cups, and you can still add a little bit of light/fat free cheese or no fat sour cream without breaking your diet! This is also one of those things that tastes even better the next day, after the flavors have all had a chance to blend. Sometimes if I'm craving something a little spicier, I'll throw in some fresh minced jalapeno's too. 

Let me know what you think when you try it! 

Friday, June 8, 2012

Avocado Tuna Salad Pita Sandwich

Recently, I've been trying to find some new ways to eat the same old "boring" foods that I love so much. I've seen several recipes for healthy tuna salad, but they lack the creaminess that the tuna salad we know and love has. I found one that used avocado to bring it that creaminess, and added a little twist of my own to create an Avocado Tuna Salad Pita! 

Ingredients
-2 small (I believe they are 6 oz) cans of Tuna in water, drained and flaked (this should yield about 6-6 1/2 oz of actual tuna)
-1 ripe Avocado, chopped
-1/2 Tomato, chopped/minced depending on how much you like tomato
-1/3 Onion, chopped/minced depending on how much you like onion
-2 tsp Dried Parsley Flakes
-1 tsp Lemon Juice
-1 Tbsp Apple Cider Vinegar
-1 Tbsp Fat Free Mayo
-Pepper to taste
-Whole Wheat Pita Pocket Halves

1. Combine all ingredients in a bowl, and blend thoroughly with a fork. 

2. Add about 1/4 of mixture to each pita pocket half, and enjoy! Feel free to add some lettuce to the bottom of the pita (like we did) for some extra crunch! 


These pita pocket halves are only 245 calories per half!! They were surprisingly filling, and adding some lettuce to give it a little bit of a crunch made it that much better! If you'd like you could throw in some sliced apples, chopped nuts, or minced jalapeno to shake it up. Super easy, took only about 15 minutes to make, and were definitely yummy! 

Give it a try, and let me know what you think. :)

Wednesday, June 6, 2012

Ellie's Garden Creations

Sorry for not posting as much recently, we finally moved!! I have been getting everything settled in, unpacked, and organized. I'll actually try to do a post on my kitchen organization soon! 

Now, my first post to get back on the regular posting bandwagon is going to be something delicious my sister invented!! This is a picture of Ellie, and one of her "Garden Creations" as she calls them. They're delicious and I calculated them to be only 25 calories for each one! They're a delicious snack, and all the veggie's are from my Mom's garden! 


Ellie uses the Formaggio brand Fresh Mozzarella balls from Sam's Club, cucumber's, cherry tomatoes, fresh basil leaves, and Ken's Lite Caesar salad dressing.

First, she prepares the cheese, by taking the cheese balls and slicing them into fourths.

Next, she prepares the cucumbers, by taking slices of cucumber and slicing them into fourths as well.

Now, you have your prepared cucumber fourths, and mozzarella fourths.

After that, she cuts/pinches the basil leaves from the stem to prepare them as well.

Now, Ellie slides a cherry tomato onto a toothpick.


Next, she adds a piece of the mozzarella, a basil leaf that has been folded into thirds, and tops it with a piece of the cucumber. 
 
 After that,  take your Ken's Steakhouse Lite Caesar dressing and pour a little into a tupperware container. Lightly dredge your Garden Creation in the dressing on both sides, and then leave it in the container. 

Finally, let them "marinate" over night, or enjoy right away!!  


These are delicious, and such a healthy, light, fresh snack! 

Let me know what you think!! 

Monday, April 23, 2012

Moving, and Kitchen Ideas

Sorry for my lack of posting in the last few weeks!! We are moving next week, and it's been a little crazy & busy! I haven't done too much cooking since we've been packing, so nothing much to post on either!

Normally this time of year, I have long started indoor planting my seeds/seedlings for my spring garden of herbs & veggies. However, since we're moving, I didn't start them...so they don't get shocked and die, or get knocked about too much. So, I wanted to come up with some way to grow something, anything easily and where I wouldn't feel guilty about it dying in the move.

So, I was thinking (actually a month ago, on my anniversary) that if you get flowers and you put them in water, what else can you put in water to last longer? So, the day after my anniversary I was cooking and used some green onions, and you know how you pretty much never end up using them all..., and I put them in a glass of water on the window sill. They're still growing now!  A month later! With the exception of a weekly "haircut" to keep them from growing too much (which is why they look all scraggly in my picture, because they just got their hair cut), they have grown beautifully and non stop! There are actually some new little onion bulbs growing on the roots right now. I just clean out the glass every couple days too keep it from getting to green, and give it a hair cut. All from one $0.89 bunch of organic green onions!
Then, I was thinking about a week ago, that if you can grow green onions in a glass like that, what else can you grow?? So, I cut up some celery and stuck the bottom of that in a container on the window sill. Look!! This much growth in a little less than a week!! It's just started shooting out little roots too! Super cool!
Yesterday, I cut up some pineapple and stuck that in the window sill too. Not sure what will happen with it, but we'll see!! I'm interested to see what else I can throw in my window sill in water and grow successfully! 

Any suggestions? =]


Sunday, April 1, 2012

Grilled Mahi Mahi


I've never really liked fish (with the exception of canned tuna...but that doesn't count)....not going to lie about that. I actually despise fish, and would rather not eat than eat fish. BUT, recently the hubby's aunt made some Mahi Mahi that transitioned me...big time, and I couldn't get enough!! Then, right after that Mahi Mahi was on sale at Kroger and I got a giant almost 3 foot long filet with the skin on one side for $7. It's sat in my freezer for about a month because I had no idea how to prepare it, let alone cook it!! Well, like I said we're cleaning out our kitchen, so I finally had to give in. It was wonderful!!

Ingredients
-Mahi Mahi filet with skin on one side, cut into individual portions
-Vegetable Oil
-Lemon Pepper Seasoning
-Saltgrass Seven Spice Seasoning

1. Rub filet pieces on meat side with oil.
2. Sprinkle generously with lemon pepper and seven spice.
3. Grill over Medium High heat meat side down for 4 minutes.
4. Use grill flipper spatula thing & flip and grill skin side down for 4 minutes.
5. Use a meat thermometer and make sure it's above 140*.

This was delicious and was great reheated in the microwave the next day.

Let me know what you think!!

Healthy Quick & Easy Pizza


Everyone loves pizza!! I'll do an "unhealthy" homemade pizza blog post soon, but  here's my healthy one first! I love doing this kind of easy and quick pizza for lunch or dinner if I don't feel like cooking.

Ingredients
-Tortilla
-Spaghetti Sauce
-Shredded cheese (I've done it with sliced too...just ripped it into several pieces and spread it over)
-Whatever else toppings you would like (I had leftover mushrooms from my salad stuff)

1. Set oven for broil.
2. Put tortilla on a greased cookie sheet.
3. Spoon some spaghetti sauce and spread it around.
4. Add cheese & toppings.
5. Broil until cheese is melted.

Super delicious and easy!!

Try it, and let me know what you think!!

Easy Weeknight Spinach Alfredo

We are moving soon, so we're doing our usual thing where we don't want to buy any groceries because that's less to take to the new house. So, we're having to get creative with what we can find in the pantry/freezer/fridge. This includes making random assortments of things...which I'm going to do blog posts on...probably tonight...maybe tomorrow....no worries!! :)

Ingredients
-1 bag of shell pasta (or whatever kind of pasta you have floating around...make sure it's not full of weevils like my first bag was..yuck!)
-1 jar of alfredo sauce (we used Ragu)
-1 can of spinach

1. Cook pasta according to package.
2. Drain pasta and put back in pot.
3. Pour in whole jar of alfredo sauce.
4. Drain can of spinach and add like 3/4 of can to pot.
5. Stir around on medium until hot/warm.


We took some bread we had and toasted them with butter, parmesan cheese, and garlic powder & cut it up for "garlic bread". This was super yummy and took maybe 30 minutes to make...tops! Mostly though because I had to wait for the water to boil twice being that my first bag of pasta had unwanted inhabitants.

Let me know what you think!!

Tuesday, March 20, 2012

Vegetable Lo Mein

I love chinese food!! Especially veggie lo mein! So, I decided to try to make some...I'm super picky and it was good! The hubby ate 3 bowls full...so much for his end of our "diet". Oh well, y'all try it! Let me know what you think! 

Ingredients
-1 lb vermicelli or chinese noodles
-1 package tofu, extra firm, cubed
-1 cup fresh mushrooms, sliced
-8 oz can of bamboo shoots (I sliced them thinner than they were sliced in the can)
-1 cup celery, chopped
-1 cup bean sprouts
-1 tsp chopped garlic
-1 tsp salt
-1 cup vegetable broth (I used my handy vegetable broth ice cubes)
-1 tsp sugar
-1 cup water
-2 Tbsp soy sauce
-2 Tbsp oyster sauce
-1 Tbsp flour

1. Cook noodles according to directions. Drain, and set aside. 

2. Add mushrooms, bamboo shoots, celery, bean sprouts, and garlic to a bowl on the side. 


 3. Take a wok or a large skillet, and add a small amount of oil. Brown the tofu in the skillet/wok over medium-high heat.


 4. Dump your bowl of veggies into the wok/skillet and saute until your preferred amount of doneness.

5. Add the salt, vegetable broth, sugar, water, soy sauce, and oyster sauce. Stir fry to heat through.

6. Add flour to thicken a little. Then, toss the noodles with the sauce/veggie mixture. Enjoy!


This recipe boasts only about 400 calories a serving. YUM!!! 

Greek Steak Pitas & Potatoes

My hubby and I when we were in college loved to eat at this little Greek restaurant in Galveston for lunch about every other week or so. They had these steak pita sandwich things that were SOOO good, and they came with roasted potatoes...mmmm!! Since we graduated and moved, we both have been craving these for  a while. I looked through a bunch of different recipes, and none of them sounded 100% like what we like. So, of course I made my own :) Oh, and I made my own roasted potatoes too. I'll share both the recipes with you! 

The Steak Pita
Ingredients
For Steak Marinade
-1/2 cup olive oil
-2 Tbsp white vinegar
-2 Tbsp balsamic vinegar
-1 large garlic clove, minced
-1 tsp ground thyme
-2 tsp oregano
-2 bay leaves
-salt & pepper to taste
-2-3 lbs sirloin steak
For Salad
-1/3-1/2 cucumber, diced (depending on how much you like cucumber, I only did 1/3-ish because Dean hates cucumber)
-3 roma tomatoes, diced
-1/2 onion, sliced thinly
-3/4 cup feta cheese crumbles
For Dressing
-4 Tbsp olive oil
-2 Tbsp white vinegar
-1/2 tsp oregano
-1/2 tsp garlic powder
-1/2 tsp sugar
-salt & pepper to taste

-4 Flatbread or Pita Bread

1. Add all the marinade ingredients to a big ziploc bag, and massage them around to mix. Add the steak and seal, and move around a bit to coat the meat. Refrigerate for at least 2 hours. Remove meat from the refrigerator about an hour before grilling (because you never want to cook meat that's still cold!!)
2. Cook on grill to desired doneness. I wanted medium, but it was raining and I didn't check it as often as I should have...so oops! I got well done!! But, luckily the marinade is amazing and it was still VERY juicy!! 
3. Mix up the "salad" in a bowl & then mix dressing into bowl with it. (I did this while the meat was cooking)
4. When the meat is done, slice it thinly against the grain. 
5. Take your pita pocket or flatbread (I used flatbread) and top with a few slices of meat, and a generous portion of the "salad". Add a little extra feta cheese if desired. 


Roasted Potatoes
Ingredients
-1 bag of red potatoes, washed & diced into bite sized pieces
-1 medium onion, peeled & diced into bite sized pieces
-1/2 bag of baby carrots, cut in 1/2
-Olive oil
-Garlic powder
-Thyme
-Oregano
-Salt & pepper to taste

1. Preheat oven to 425*. 
2. Spread potatoes, onions, and carrots evenly on a large cookie sheet. Sprinkle olive oil, garlic powder, thyme, oregano, salt and pepper over them and mix (I just used my hands) to distribute seasonings evenly. Make sure there aren't really any veggies on top of one another and such so that they will properly roast.
3. Bake for about 40-45 minutes, or until your desired amount of roasted-ness. (I like mine crispy...as you can see in the picture, so mine went for about 50 minutes.)


Tuesday, March 13, 2012

Easy Healthy Taco Salad

Yum! What's better than Mexican food?? Ok...maybe chocolate. But, for the current point...I love Mexican food!! But, it's SOO terrible for you. So, I decided to create a HEALTHY alternative to satisfy my craving for some good ole' TexMex. It was delicious!! Also, it's less than 500 calories!!

Ingredients (for 1 serving)
-2 handfuls of salad mix (from my last blog post) roughly chopped/shredded
-1/2 avocado, diced
-1/2 roma tomato, diced
-1/3 can of whole black beans, rinsed
-1/3 can of whole sweet yellow corn, rinsed
-1/4 cup shredded light cheddar cheese
-2 spoonfuls of salsa (as "dressing")
-2 chicken strips, or 1/2 a boneless skinless chicken breast, thinly sliced (like fajita meat)**
-Low sodium taco seasoning packet (I just used the Kroger brand)

**I use the Tyson frozen bagged skinless boneless chicken breast strips, because they're easier and smaller portioned.

1. Cook chicken in large skillet, and once no longer pink add taco seasoning plus however much water it says according to the seasoning packet.
2. Layer your ingredients on your plate or bowl, lettuce on the bottom and then sprinkle everything else on & top with your salsa.
3. Enjoy!


This was super easy, super quick, nice weeknight meal! I took a handful of Tostito's "Hint of Jalapeno" Tortilla chips and crumbled them over the top, for some crunch. Even my hubby (who hates his veggies) loved it, and said we need to make it again!

Try it!! Let me know what you think in the comments!!  :)

Monday, March 12, 2012

How I Make Salad on a Budget

I know lot's of people like salad, but don't buy it because when you buy it in the bag pre-made because it can be really pricey. Then, the stuff in those bags comes with enough for like 3 salads and then usually it's half wilted anyway....and then even worse if you don't eat it within 2-3 days of buying it it's all nasty and wilted...waste of a bag of $5 salad mix!! So, I decided to experiment a few months ago and see how much cheaper and longer making my own salad would be. I'm super organized with my food/pantry/refrigerator, so my salad making is pretty much the same. Yeah, it's a little more time consuming that just buying a "ready made" bagged...but, it lasts about 2 weeks and only takes like 30 minutes to put together!! 

First, I obviously wash and separate all the lettuce. I use an organic romaine ($1.99) and iceberg ($1).

 Then, I chop up the lettuce using my super awesome Chefmate chef's knife. 

 As I'm chopping, I throw the lettuce into my salad spinner, and spin the water out. This is important because the drier the lettuce, the longer it will stay good.

Once it's nice and dry-ish I dump all the romaine in one bowl to the side.

Next, I'll chop up the iceberg. I find it easiest to chop it in half, then cut it into wedges to break apart. As I'm cutting it up and breaking the pieces apart with my fingers, I'll throw it in the spinner and spin it out. Then, I put it in another big bowl to the side. 

 Then, I just take half from each bowl and "exchange" bowls and toss it together. Cover it with plastic wrap, and keep it in the fridge! So, you end up with these two giant bowls of salad for only about $3. Compare that to your wimpy pre-mixed bagged salad!! 

I'll also buy a celery bunch, a couple cucumbers, and a big thing of mushrooms, and a bag of baby carrots. All that was about $4 for the "extra goodies" for the salads. I went ahead and chopped everything up and put the veggies in their own separate baggies. This way when we make our salads for lunch/dinner/snacks it's like a salad bar....everyone gets what they want. I love cucumber's, my hubby doesn't. Sometimes I'll have cucumbers, sometimes avocado...it just depends on what's on sale that week. 

I've had my salad mix stay for nearly two weeks, and it was STILL good...we just had eaten it all. I highly recommend doing this. Eating healthy can be cheap! You just have to be willing to put in a little work...not even a lot...just a little! 


Healthy Baked Crab Rangoon's

I love Chinese food...especially those little fried crab wonton rangoon thingies. I was thinking that there must be a way to make those absolutely terribly unhealthy for you forms of deliciousness...remotely healthy. After doing some research, thinking, and experimenting, I created some absolutely delicious forms of healthiness! :)

Ingredients
-square wonton wrappers
-1 (8oz) package of Neufchatel cream cheese, softened
-1 (8oz) package of crab meat, shredded (I used imitation because it was on sale for $2)
-green onions

1. Preheat the oven to 350*.
2. Spray down muffin tins with cooking spray. I used a 12 muffin pan and a 6 muffin tin, to make 18. 
3. Lay a wrapper over each tin, and push it in a little to line tin. 
4. In a medium mixing bowl, mix together the crab meat and cream cheese.
5. Spoon mixture into each tin on top of the wonton wrappers.
6. If desired, push another wrapper in along the top of the crab meat. I did half of mine this way. It makes them have some extra crunch.
7. Sprinkle green onions over the top.
8. Bake at 350* for about 10 minutes, until heated through and tips are golden brown. 


Can you believe these are only 64 calories a piece!! Compare that to the around 200 calories a piece for the fried ones!! I had a few of these and a salad for a nice little dinner. 

Try them out, and let me know what you think!! 

Tuesday, February 21, 2012

Thank You Pinterest!

So, I've been collecting berries, since they've been on sale at the grocery stores recently, to freeze so that I have a nice amount stored for when I begin my breakfast/green smoothie adventure. I saw a picture on Pinterest about using a straw to hull strawberries. I tried it....thinking there was no way it would work, especially on those odd shaped strawberries with like 2 bumps and stuff. But, it did!! 

Here's the strawberry "guts" and leaves.


It was so easy!! Just popped the straw up through the middle and done! 

Then, I sliced them in half and put them on a cookie sheet to freeze overnight. Tomorrow I'll put them in labelled ziplocs to store! :) 


Homemade Vegetable Broth

Ok, I know I said I was doing this post a few weeks ago...but I lost my pictures. Anyway, I was reading and found out that for any recipes that call for chicken or beef broth you can easily substitute in vegetable broth without losing any flavor. It's an easy way to add more vegetables, vitamins, and nutrients to your diet!!

However, the vegetable broth from the store I found to be really expensive for something so simple. Also, I did some research and found out that most vegetable broth you buy at the store is made from rotten vegetable scraps...gross!! So, this inspired me to look into making my own...how hard could it be?? Here's what I did...

Ingredients
Must have for base/minimalist broth:
-3 Tbsp olive oil
-2 large onions roughly chopped
-1 bunch of celery washed, roughly chopped
-1 bunch of carrots washed, roughly chopped, unpeeled (or even baby carrots, about 1 lb)
-3 whole cloves garlic
-1 bay leaf
-15 whole peppercorns
-1 Tbsp salt
-1/4 cup soy sauce
-1 gallon water

Other stuff you can add:
-Parsnips
-Tomatoes (pieces, diced, canned, fresh, or even paste/sauce)
-Broccoli
-Sweet Potato
-Potato
-Leeks
-Mushrooms
-Peppers
-Turnips
-Lettuce, Spinach, or any other greens
-Zucchini
-Cucumber
-Fennel
-Fresh Parsley
-Fresh Rosemary
-Any other veggie scraps really..

1. Basically, put 1 gallon of cold water in a large stockpot. Then, keep adding stuff until you feel satisfied. As long as it's clean and it fits you're good to go!
2. Heat until it's boiling and then reduce heat, cover & cook for about an hour or so. It will smell amazing!!
3. Taste and adjust/add any other seasonings you might like.
4. Uncover and simmer for an additional 30 minutes to an hour to concentrate the flavors.
5. Then, take it off the heat and let cool for a little bit.
6. Next, I placed some cheesecloth over a nice pourable pitcher, and began straining/squeezing all the juices out.
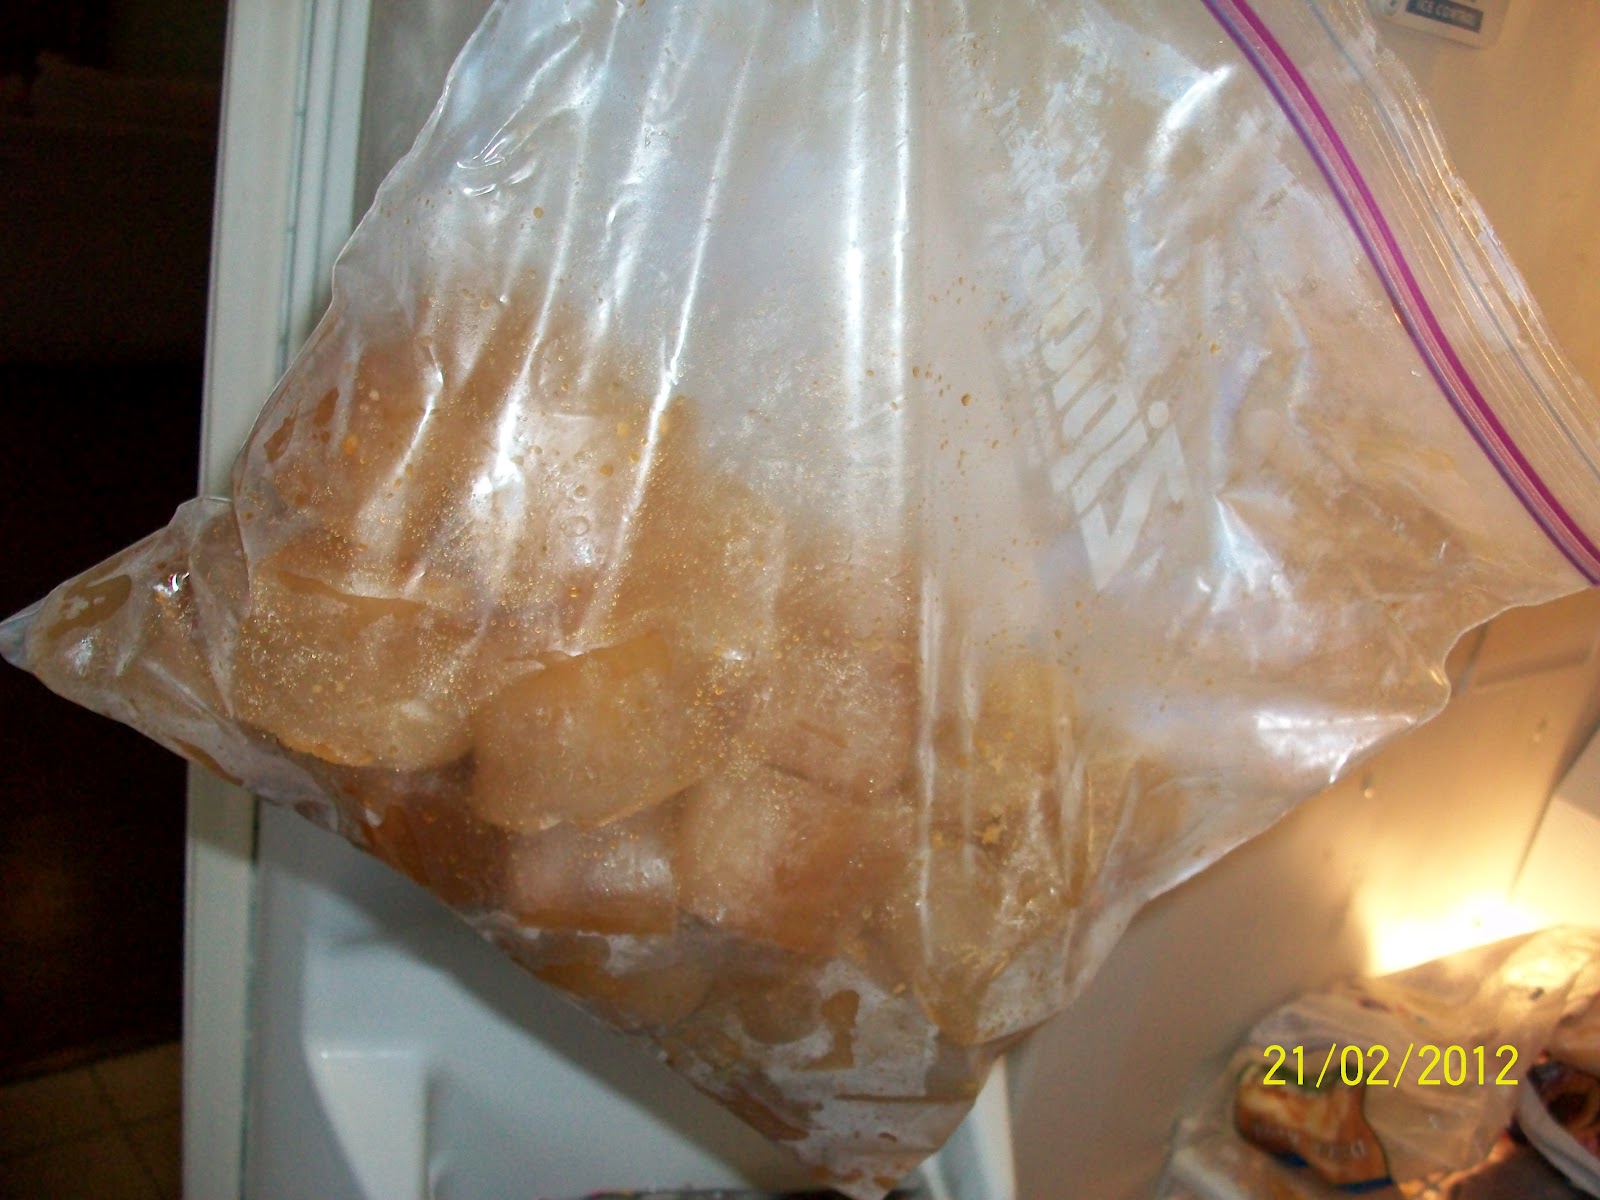
7. Finally I poured it all into ice cube trays and let them freeze over night. Then, popped them into ziplocs. Be sure to write on the ziplocs how much an ice cube is worth...mine are about 1/4 cup a cube.

Here's my vegetable broth ice cubes. (I forgot to take a "before" picture)

Here's my cubes in the ziploc! 


Thursday, February 2, 2012

Hunan Chow Mein

Serves: 6
Time: 30 minutes

Ingredients
-1 medium onion, chopped
-3 cloves of garlic, minced
-2 tablespoons of peanut oil
-2 tablespoons of soy sauce
-1 teaspoon dried mustard
-2 stalks of celery, sliced diagonally
-2 cups of bok choy, chopped
-1 red bell pepper, sliced
-8 oz can water chesnuts, sliced
-1 cup vegetable stock
-1 cup mushrooms, sliced
-4 cups white rice, cooked

1. Cook onion & garlic in oil in a wok or large skillet over high heat until onions begin to soften (about 3 minutes).
2. Stir in the rest of the ingredients (except the rice).
3. Continue cooking, stirring frequently until all the veggies are almost tender, but still a little crispy (about 5 minutes).
4. Serve over rice!

This was really yummy! Dean added a little extra soy sauce to his, but to me it had enough flavor. I tried to take a picture, but by the time we finished eating and I went over to take a picture (I do this, because Dean always saves one serving for him to take to work the next day for lunch) the "rest" had already been eaten!! Oh well, I guess I'll get a picture next time. But, either way this definitely turned out better than my experimentation with Thai food earlier in the week which wasn't even worth documenting...

Anyway, try this one!! It's delicioussss!! Feel free to add or take out any veggies and substitute for your favorites! Just make sure you get all your veggie food groups!! :)